


Concrete Mat Detailed Construction Process
1. Site Cleaning
Try to remove debris and sharp objects, such as trash, bricks, and glass fragments. Keep the slope as level as possible; uneven surfaces may prevent the concrete mat from fitting perfectly to the ground, resulting in voids underneath that could lead to collapse later.
2. Digging an Anchor Trench
Dig an anchor trench about 10 cm from the top of the slope (not very deep) to secure one end of the concrete mat, preventing it from rolling off during the installation.
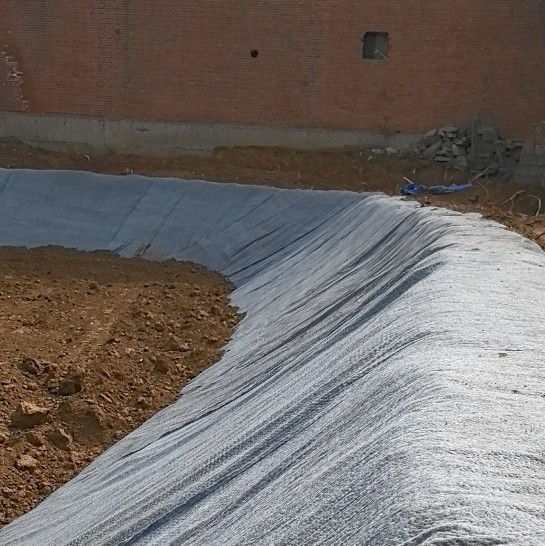
3. Laying and Securing
Move the concrete mat to the edge of the slope and use U-shaped nails (sold by the manufacturer at the original price) to fix one end in the anchor trench. Let it naturally roll down the slope until all mats are laid. Note that each mat should overlap the adjacent mat by 10 cm for securing with U-shaped nails.
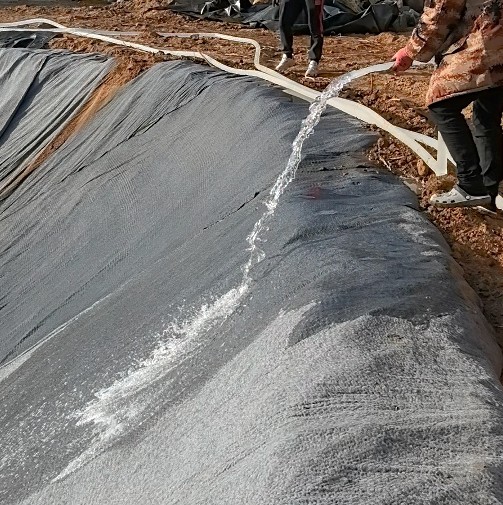
4. Watering and Curing
Once all mats are installed, water them thoroughly. The first round of watering should saturate the mat completely, ensuring no areas are dry underneath while the surface is wet (wait 24 hours). The second round of watering helps to consolidate the mat. After it dries, the installation is complete. Depending on the local conditions (weather, temperature), a third round of watering may be considered if necessary.